Heroes of Arkesia,
The recent Mystics and Mayhem Update included the Inferno Vykas Legion Raid and the Achates Trial Guardian Raid. While Legion Raids prove to be a challenging experience for many— Inferno takes it to the next level. It’s all about proving you’re the among the best of the best in Arkesia and earning the accompanying prestige. In a challenging experience akin to Inferno Legion Raids, the Achates Trial Guardian Raid is a new activity and displays both the first clear in the region and fastest clear time. With an inevitable competition brewing for those coveted slots, we will be opening the raid simultaneously at a more friendly time for all regions, Sat 10/29 7PM UTC, to let as many players as possible participate in the competition.
We partnered with veteran Lost Ark raiders Saintone and Lustboy to provide tips, tricks, and other advice for groups looking to accomplish these new challenges and compete in the race to defeat Achates.
VYKAS INFERNO
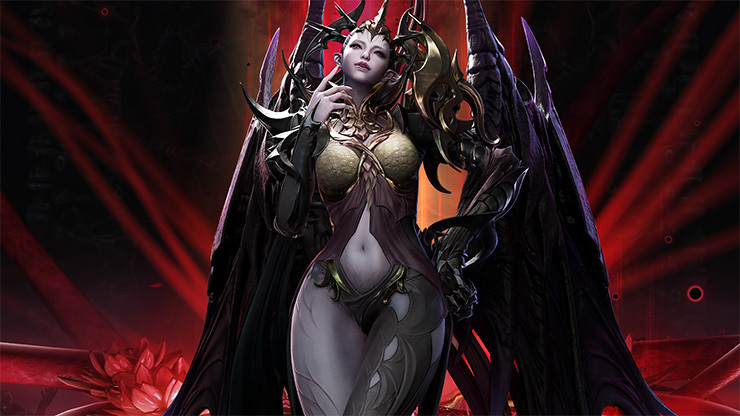
The most difficult version of Legion Raids, the Inferno difficulty is all about proving you’re among the best of the best in Arkesia and earning prestige. Rather than chasing the normal rewards of gear, materials, and everything else you’d receive in a Legion Raid, Inferno rewards instead showcase your victory with titles, achievements, and Stronghold structures! ‘Scale of Balance’ is applied, and the raid requires use of the Book of Coordination, so everyone’s gear is normalized against the level of your Legion Commander opponent. Entry into the Vykas Legion Raid Inferno difficulty will require Item Level 1460. For more general information on Inferno Mode, make sure to checkout our previous Lost Ark Academy on Inferno difficulty.
We’ll break down tips and tricks by gate below, but first, let’s kick things off with a message from Saintone:
“Hello Inferno raiders!”
“Inferno Vykas has arrived, and the challenge ramps up significantly for those who previously battled against Inferno Valtan. Compared to what you’ve experienced, this one’s going to be a lot tougher. Whenever people ask me about the two, I usually describe Inferno Valtan as the beginner’s segue into the Inferno difficulty.”
“The DPS check this time around is significantly tighter. So much so that most DPS cannot afford to not bring an Atropine Potion to help with damage like they had previously. While before the challenge lied purely in the second (and last) gate of the encounter, this time all three gates will prove to be a great obstacle for you.”

Lustboy also has some general advice when preparing for Inferno Vykas:
“The first and second gates have very tight DPS checks. Morphe and Vykas will often enrage until every party member gets comfortable with the damage windows while succeeding the new patterns and mechanics. All classes are viable, but having too back attack classes in the same party results in higher chances of the boss turning and subsequent DPS loss. Trying different classes and compositions might help your group, but that doesn’t mean you can’t clear the raid with certain classes. One class that shines against Vykas is the Gunlancer:”
-
Morphe is a tauntable boss, so you can cancel specific patterns during which it’s almost impossible to deal damage.
-
Vykas in Gate 2 is staggerable. Having someone dedicated to counter patterns can create important damage windows.
-
Gate 3 has two major mechanics requiring stagger, plus the Gunlancer can use Preemptive Strike for the Tentacle mechanic.
“You don’t need a Gunlancer to clear the raid, but it helps the team with difficult patterns and mechanics that can cause a raid wipe despite not contributing as much damage.”
GATE 1 - MORPHE

Before we dive into the specific recommendations for both the Blue and Purple Dimensions, Saintone had some general advice for parties looking to begin the encounter:
“Starting with the first gate, be mindful of the fact that the raid party is split into two groups. As the time is pretty strict here, it’s important to find a delicate balance in how much damage each group deals. If one side is too powerful, they will end up having to wait for too long dealing no damage while the other group catches up. The fight doesn’t start at the same HP for both bosses though, so the purple side will have to enlist the help of Nineveh to help balance out the damage between the two parties. Because of the damage balancing act, you should smartly allocate your Atropine Potions between the blue and purple dimensions to ensure both sides are properly damaged at the appropriate speed.”
Lustboy had some general advice on Battle Items and managing time in an activity with no HP bar.
“For Battle Items, you usually want to take Dark Grenade, Health Potion, Atropine (or maybe Stimulant Potion) and Swiftness Robe or Luterra Horn. For Dark Grenade usage, you should use 2-3 of them in the Blue Dimension and use the rest in the Purple Dimension. Make sure to use them in coordination with Awakening skills or big buffs like Serenade of Courage or Blessed Aura. I highly recommended supports use the Explosive Expert Engraving.”
“As you can’t see the HP bar in Inferno or Trial content, it’s important to let your teammates know if you’re landing key damage skills (or missing) so you have a rough timeline when a mechanic is likely to arrive. You’ll have to save your main stagger skills if your party is on the lower side for stagger so this kind of communication can help when you’re still learning and progressing. The followings are general timestamps for the splits if your party is doing well. The first split should happen around 11:00 - 10:50, and the second split (at least) at 05:40. Anything beyond these timestamps and Morphe will likely enrage.”
BLUE DIMENSION
Lustboy says “the fight is largely the same in the Blue Dimension compared to Hard, except all 4 have to succeed the color gate mechanic and the stagger check mechanic feels a lot tighter since you don’t have Whirlwind Grenade and you don’t know when it will arrive. Also, the gates don’t have set starting colors anymore.”

There’s one specific attack Saintone recommends keeping an eye out for in the Blue Dimension: “When he swings twice into a big swing, he has a tracking motion on the two swings on his aggro target. The purple boss is easier to avoid with no tracking, instead moving in a straight line.”
PURPLE DIMENSION
Lustboy cautioned players; “The purple dimension is more difficult to do damage. It doesn’t have any major mechanics so normal patterns are harder to compensate. The DPS opportunity feels very tight since the boss moves and attacks faster than how he does in regular raids and the damage is significantly stronger where enough to get one shot sometimes unless you’re playing a tanky class. Because the Purple Dimension is a lot more difficult, you can make it up with Awakening damage.”
Lustboy continued with a few more recommendations.
“It’s very important to recognize who’s aggroed. Because the boss does a lot of damage you don’t want to accidentally turn his face and friendly fire a teammate.”
“There’s a pattern called ‘Donut Explosions’ which happens frequently in the Purple Dimension but not as often in the Blue Dimension. This pattern is extremely dangerous and Morphe becomes un-targetable. Even skilled Inferno players die often, and it frequently ruins deathless attempts. To prevent lethal situations in this mechanic, you want to kite the boss to the middle. This is why it’s important to work on identifying who’s aggroed so you can reliably move the boss.”
Saintone agreed with Lustboy, advising players to be prepared for this mechanic. “On the Inferno difficulty, the blobs drop too fast for you to shimmy back and forth, so you will need a good game plan with your party to revolve in such a way where people don’t overlap with one another.”

Saintone continued his warnings with another attack players should be on the lookout for: “There is an attack both bosses do where they charge forward. The blue one has a delay before he dashes, making it an easy telegraph to avoid. However, purple Morphe has almost no telegraph and the dash is nearly instant dealing extremely heavy damage— enough to instantly kill players on classes that have the lowest defense coefficient if they have no mitigation. It’s a good idea to always be moving perpendicular from the boss so that you’re prepared to avoid this attack if necessary.”
SIDEREAL USAGE

Lustboy also had some recommendations for when Nineveh should be used during Gate 1.
"All Sidereal skills and Awakening skills should be used before enrage occurs. So if you can’t pull out the dimension split happening beyond a certain threshold, you won’t be able to use all 3 Awakenings or Sidereals in time, causing the boss to enrage. You can use Sidereal skills up to 3 times in Gate 1, which should be Nineveh to deal damage. Ideally, this is how Nineveh should be used:"
-
Purple Dimension- as soon as the boss gives you a pattern with the right opening.
-
Blue Dimension - after the Purple Dimension uses their Awakening after the split to guarantee the NESW mechanic. This means the Purple Dimension will also have to do the safe zone mechanic shortly afterwards so the damage window will be pushed back.
-
Purple Dimension - this comes to preference, because you have to choose to use either the last Sidereal or Awakening in the semi-enraged phase where Morphe moves even faster. Generally, people prefer to use Nineveh after using Awakening skills (during the semi-enraged phase) since it feels safer for DPS, even though it’s harder for the player activating Nineveh.
GATE 2

“Vykas G2 is usually considered the most difficult gate, and arguably the hardest gate across Inferno content. Vykas does a lot of damage and has a lot of patterns where she becomes un-targetable. At least you won’t be short on DPS for G3 if you can clear G2! Battle Items vary depending on party composition, but if you’re unsure take full of Dark Grenades with Atropine/Stimulant potions. Swiftness Robe is recommended for DPS classes and Supports can take Sacred Charm instead.” -Lustboy
MAJOR DIFFERENCES & GENERAL STRATEGIES
Saintone started off discussing a mechanic that becomes much more difficult during this gate. “There’s a pattern that usually is fairly harmless which is the purple ring that detonates into a massive AOE after it touches a player or has traveled far while tracking a target. In Inferno mode, you’ll have to deal with two of these purple rings at once, and they travel significantly faster. It is pretty much impossible to separate these rings due to the AOE size, so you will have to devise a communication system where players know where to move. The speed of the purple rings means you have to act fast and be very decisive on where to bring the rings, and if both the purple ring targets aren’t on the same page, it will spell certain death for the group.”

Lustboy continued with a further list of key differences and strategies to complete, “Two random players will be marked during the Laser pattern. Electric explosion pools spawn under their feet during the pattern, dealing massive damage. Assign everyone’s position and have them go back and forth in their personal space, which is safer than have everyone running around in a circle with different movement speeds and needing to dodge the puddle while running in a circle.”

“Vykas now shoots red projectiles from the center during the black & red orb mechanic. Getting hit is a guaranteed death without damage reduction effects. During the mechanic, the black orbs cause knock back and a paralysis effect. You might get hit by the red projectiles when you get knocked back, so try to use a skill with paralysis immunity when you take the black orb.”

“The purple puddles that shoots 3 projectiles will explode in Inferno when placed too close to each other, dealing fatal damage. Place the purple projectile puddle in an Y shape if possible, because they explode if overlapped, the boss is staggered, or there are too many of them on the map simultaneously. Since the Black Clones generally spawn at 5, 7, and 12 o’clock position in the black & red orb mechanic, you won’t get hit by the explosion when Vykas gets staggered on success.”
“Sometimes Vykas does a grab pattern (with a tell very similar to her regular counter pattern) but she won’t shoot the projectile like her regular counter pattern. Shortly afterward, she’ll shoot big projectiles which deal a lot of damage before dashing to the aggroed player and grabbing everyone in the way. Most DPS classes will die if grabbed, even at full HP. It’s important to determine who’s aggroed to prevent her from shooting the big projectiles at the group, and for the aggroed player to dodge her grab by running away or stepping aside when she dashes.”
GATE 3
Lustboy says that “the third gate has easier DPS checks and generous DPS opportunities, assuming you know all her regular patterns and feel comfortable with them! It can feel overwhelming for some people, but the encounter itself should be easy once everyone gets used to the new patterns and the differences in previous patterns.”
Building off of this, Saintone states, “In the final gate, the DPS check is most lenient, implied that you correctly take advantage of the lust gauge. This is something that you never have to do in Normal or Hard mode, but when the gauge is over 70%, you gain a significant stacking DPS buff. However, this is a double-edged sword, since you’ll also take more damage, so much so that certain patterns may outright kill you from full HP if you’re on a squishier class. On top of this, the invisible whale pattern that travels across the screen is significantly more dangerous in Inferno mode, and being able to know where to move without having to follow someone will greatly aid you. Also an extra tip, there is no memorizing safe spots for the sword and statue pattern early in the fight. Inferno mode introduces several more permutations that make it impossible to know the safe spot definitively just from one set of information, so get in the habit of doing the mechanic properly.”

Lustboy had a few final tips on some new normal attack patterns, the mind-control mechanic, and a word of advice for support players.
“Vykas can do an Inferno exclusive normal pattern; she chooses a random aggro and slams ground with her sword. She changes aggro if the initial player gets hit by the slam. She does a short dash with the fourth and final slam, creating an explosion with a safe zone at the center.”

“Vykas can do another Inferno exclusive normal pattern; she spins with a donut shaped safe zone around her. Getting hit doles out massive meter gain and damage. This is often used for meter gain with damage reduction or/and shield care from supports.”
“You’ll be immune to crowd control effects for 5 seconds after getting mind-controlled by a full meter. This is where most wipes come from, so pay extra attention to not get hit by attacks that give you the gauge meter. Supports want to save a damage reduction skill until all the DPS have their lust meter filled up to 70%, and want to save an Awakening skill for the lust puddle mechanic following the typing mechanic to prevent teammates from dying to friendly fire when someone gets mind-controlled earlier than others.”
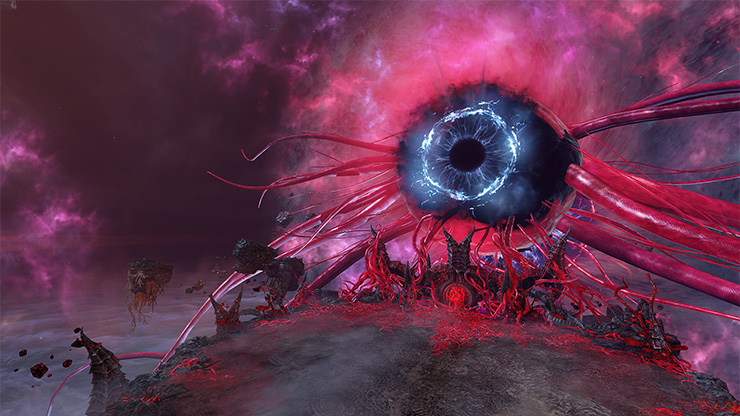
ACHATES

A challenging experience akin to the Inferno difficulty of Legion Raids, the Achates Trial Guardian Raid can only be entered after setting up your build through the 'Book of Coordination'. If defeated, prestigious rewards of achievements and a Legendary Title will be earned by the vanquishing party to award prestige and celebrate their hard-fought victory. Let’s start off with an introduction from Saintone:
“While this is technically an Inferno difficulty content, it’s also the easiest one released in Lost Ark. Inferno Guardians are a bit different— the fight itself is less structured, you’ll just need a good mastery of the Guardian’s nuanced mechanics. Unlike the Inferno Legion Commanders, Achates features no unique mechanics different from his normal Guardian form (just some slight rebalances), meaning it’s possible to practice the encounter by under-gearing yourself in the regular Guardian Raid.”

“However, do note that because this fight is on the easier side (comparatively) that the battle for the first clear is extremely fierce. You should expect that the boss will go down in your region within 10-15 minutes of its timed release. Many groups will defeat the boss in their first attempt, so you’ll need a great strategy to reduce your time as much as possible if you want the coveted first clear title that only four players per region get.”
“Firstly, Inferno guardians only require item level 460 to participate in and use the Book of Coordination, so you can easily raise any class you want for this fight. While Achates is a lower level guardian, you will have access to the full suite of T3 assets to help you in the fight, including Tripod levels, Runes, Gems, and gear set bonuses. That also means of course, that the HP is scaled up on the boss accordingly.”
“Because of the fight’s timing, you should be mindful of the best time to use your Atropine Potions here. The common strategy is to utilize them after the statue mechanic when the boss has been staggered, but you may encounter this pattern more times than you have potions, so align with your support appropriately.”
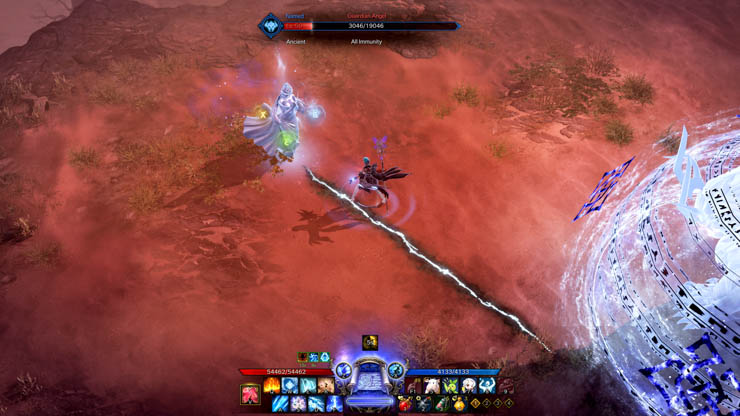
MAJOR MECHANIC - STATUES
Lustboy has some advice for the most important mechanic found in the raid.
“Before starting, everyone needs to decide their color before the raid starts, between Blue, Green, Yellow, and a flex role.”
“Achates becomes invulnerable and flies away at certain HP, then appears in the middle of the closest starting point, checkable on the map or mini-map. He’ll wear a colored shield (out of 3 previously mentioned colors), and 1-4 statues will spawn nearby. Everyone has to break the statues to pick up the colored stones they drop, then throw the stones that match the color of the shield to break it. You’ll need to throw 2 stones to break a shield, which is why a flex role is necessary.”
“Achates will shoot colored projectiles out until this mechanic ends. The team will need to body-block their assigned color, as otherwise players could be interrupted while doing the mechanic. After you break the shield, he’ll proceed to a weak point check, which shouldn’t be too difficult with a corrosive bomb and destruction bombs.”
“Failing the mechanic will cause Achates to channel a big white orb that pulls everyone toward it, and you have to run away while dodging projectiles. The orb eventually explodes, dealing massive damage that’s likely a one-hit kill. Achates then enrages, his attacks becoming faster and more deadly. You can revert Achates to normal by staggering him, but if you’re not going for region-first clear, it’s likely better to reset the raid from a battle resource perspective (battle items, timer, death count, etc.).”
LETHAL NORMAL PATTERNS
Saintone had some advice on the most Lethal normal patterns you’ll encounter when facing Achates:
“The number one attack to be careful of? There’s two. There’s the double pizza, which you should just run out of if you’re not confident in dodging it. And there’s the back-step flame breath, which if you get hit by this, you’ll be out of the fight for several seconds unless you’re a ranged damage dealer.”

Lustboy agreed with Saintone on the importance of watching out for those attacks, offered some advice on positioning for the double pizza pattern, and suggested watching out for one more lethal attack:
“He casts pizza slice shaped AOE attacks twice. The slices look randomized, but there’ll be always safe spots at in the intercardinal positions and left and right of Achates for the first pizza. The cardinal positions of Achates are safe spots for the second pizza, but it’s recommended to just run out of pizza range if you have hard time recognizing the safe spots.”

“In another critical mechanic, Achates marks 2 random players with a red or blueish-white debuff. The marked players need to maintain contact with each other until the curses are lifted, or the player with red mark will take massive damage ticks until death.”

LOOKING AHEAD
Make sure to follow Saintone and Lustboy for more raiding tips, guides, live high-level Lost Ark gameplay, and more original content on their channels, found here:
Saintone - Twitch, YouTube, and Twitter
Lustboy - Twitch, YouTube, and Twitter
We could supply nearly endless tips for these difficult raids. For those looking for more advice, Saintone welcomes all interested raiders to the Hell Academy Discord, a place for Inferno mode enthusiasts to learn more about the fights, builds for classes, and find other raiders in a server that he helps run.
“Good luck to those racing for the first clear on Achates! And as always, if you’re looking for more resources, tips, and LFG for these perilous encounters, the Hell Academy Discord is always available to join!” -Saintone
Thanks for joining us for this special edition of Lost Ark Academy, and we wish you luck in your battles!


Sort by:
Comments :0