Phase Two of TBC Classic adds two new raids to the game, Serpentshrine Cavern and Tempest Keep: The Eye. Both provide brand new challenges, as well as powerful new gear upgrades.
We’ll be breaking down Tempest Keep, and here’s everything you need to know before going to face Kael’Thas and his minions.
Tempest Keep — Location, attunement, and gear requirements
As the name suggests, The Eye is located within Tempest Keep. You’ve likely already been in the area (in Eastern Netherstorm) and The Eye is the biggest of the floating ‘ships.’ However, to get inside you’ll need to complete a lengthy attunement.
How to enter Tempest Keep: The Eye (Attunement)
In order to be attuned for The Eye, you’ll need to complete a very long quest chain. It starts with The Hand of Gul’dan in Shadowmoon Valley and ends with Trial of the Naaru: Magtheridon in Shattrath City.
Gear requirements for Tempest Keep
There are no specific gear requirements for The Eye, unlike Serpentshrine Cavern where Tanks require resistance gear. However, it is still considered to be the harder of the two, based on the mechanics, as well as how much damage the monsters do and their health pools.
This means your group should have the best gear possible before attempting this raid. Everyone should have obtained as many items from Phase One raids as possible, and it would be best to go to Serpentshrine Cavern first and pick up some items to power up even further.

Al’ar — Guide and tactics
Al’ar is the first boss of The Eye and a very interesting one. The fight is based on mobility, with the boss moving around four different platforms every 30 seconds, before moving to a more traditional fight in its second phase. Here’s what you need to do for this fight:
Phase 1
Tanks:
- The main Tank should start the fight standing on the left ramp, as Al’ar will fly there when pulled.
- Two other Tanks should spread out around the other platforms, as Al’ar will move every 30 seconds.
- One Tank should stay on the ground floor, ready to pick up adds that spawn when Al’ar moves. These explode on death, so should be moved away from the raid.
- If Al’ar flies to the middle of the room, Tanks should jump to the ground floor to avoid Flame Quills, then go back to their spots after.
Healers:
- Make sure the add Tank is topped up when the adds are about to die.
DPS
- Focus adds when they spawn (remember they explode on death!)
- Take down Al’ar!
Phase 2
Phase 2 starts when Al’ar is killed. Being a Phoenix, it comes back to life and must be taken down again. However, there are a few changes: Al’ar is now tanked normally on the ground floor and changes some abilities.
Tanks:
- Al’ar should now be tanked in the middle of the room.
- Tanks should taunt off of each other when Melt Armor is applied.
- Avoid Flame Patch.
- Pick up adds that spawn after Dive Bomb.
Healers:
- Avoid Flame Patch and Dive Bomb
DPS:
- Avoid Flame Patch and Dive Bomb
- Focus adds when they spawn, then kill Al’ar.

Void Reaver — Guide and tactics
Void Reaver is the second boss of The Eye and definitely the easiest one. He has just a few abilities and just requires a simple bit of movement. Here’s how to take down Void Reaver:
Tanks:
- Tank the boss in the middle of the room.
- When one Tank is hit by Knock Away, the other should hold aggro.
Healers:
- Focus healing on melee when Pounding is cast.
- Avoid Arcane Orbs.
DPS
- If you’re melee just hit the boss — yes, it’s that easy!
- If you’re ranged, avoid Arcane Orbs.

High Astromancer Solarian — Guide and tactics
This fight is definitely a step up from the previous and does require some management to take down. It’s split into three phases: the first two are the hardest, but the third is a simple one. Here’s how it all works:
Phase 1
Tanks:
- Tank the boss in the middle of the room.
Healers:
- If targeted by Wrath of the Astromancer, run away from allies.
- Focus healing on anyone targeted by Arcane Missiles.
DPS:
- If targeted by Wrath of the Astromancer, run away from allies.
- Take down the boss.
Phase 2
Every 50 seconds, phase 2 of the fight starts. Solarian will disappear, spawning a wave of adds from three portals. After 15 seconds, she will reappear again with two more adds and return to Phase 1.
Tanks
- Pick up the adds ASAP.
- One tank should get ready to focus on Solarian and her two adds after 15 seconds.
DPS:
- Let your Tanks get some aggro, then AoE down the adds.
- When Solarian returns, focus the adds, then the boss.
- Classes with interrupt abilities should interrupt Solarian’s adds spells.
Phase 3
Once Solarian reaches 20%, she breaks the Phase 1-2 cycle and enters Phase 3. This is a simple phase, where Tanks only need to hold aggro and the only mechanic is an AoE fear.
Tanks:
- Tank the boss in the middle of the room.
Healers and DPS:
- Use things like Fear Ward and Tremor Totem to disrupt Solarian’s fear.

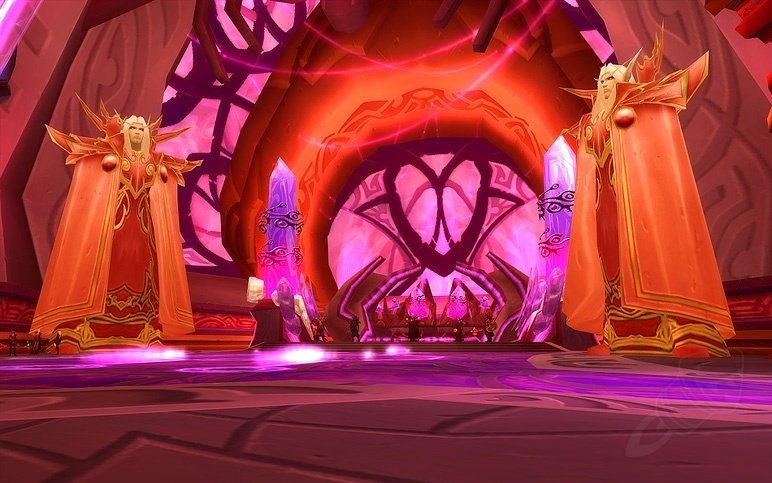
Kael’thas Sunstrider — Guide and tactics
The last boss of Tempest Keep is Kael’thas. This fight is long, complicated, and one of the hardest in the whole expansion. It’s split into a total of five phases. Let’s break them down one by one:
Phase 1
In this phase, you’ll be killing Kael’s advisors, they become active in the following order: Thaladred, Sanguinar, Capernian, and Telonicus. This part is actually quite easy and it’s best to break it down by each advisor. (Note: They are revived in phase 3, so pay particular attention to where you kill them.)
1. Thalandred
Thalandred casts Gaze, which makes him chase a player. If you are targeted by Gaze simply run away, while everyone else can focus on killing him. It’s vital that Thalandred dies in the back of the room.
2. Sanguinar
Sanguinar fears nearby players. A Tank should tank him, while Ranged DPS and Healers stay at max range. Tremor Totem is a great tool here!
3. Caspernian
Caspernian should only be attacked by ranged DPS. She casts an Arcane Explosion if anyone is in melee range, so a Warlock usually Tanks her while at least 30 yards away from the raid.
4. Telonicus
Telonicus is very simple. He places a Remote Toy debuff on random players which periodically stuns them, but otherwise can be Tanked and simply killed.
Phase 2
Phase 2 begins when Telonicus is killed. This is when seven legendary weapons are spawned by Kael’thas and will need to be killed. You’ll need to pick up specific weapons depending on your class, but first, let’s look at how to take them down.
Tanks (pick up the Shield)
- One Tank should move the Cosmic Infuser (the small Mace) away from the rest of the weapons as it does an AoE heal.
- One Tank should move Devastation (the big Axe) away from the raid as it does AoE damage.
- The rest (except Netherstrand Longbow — the Bow) should be Tanked together.
- Pick up and equip the Phaseshift Bulwark (Shield) once weapons are defeated.
Healers (pick up the small Mace):
- Pick up and equip the Cosmic Infuser (small Mace) once weapons are defeated.
DPS (pick up staff for Casters; small Sword for Melee DPS; Bow and Dagger for Hunters):
- One DPS should Tank the Netherstrand Longbow (the Bow), facing away from the raid.
- Focus the Cosmic Infuser first.
- Kill the rest of the weapons.
- Caster DPS should pick up and equip the Staff of Disintegration (the Staff).
- Melee DPS should pick up and equip the Warp Slicer (the small Sword).
- Hunters should pick up and equip Netherstrand Longbow (the Bow) and Infinity Blade (the Dagger).
Phase 3
Phase 3 begins two minutes after Phase 2 starts. This is when Kael’thas resurrects all of his advisors and you have to take them all down together.
You’ll want to kill them in the following order:
- Kill Thaladred
- Melee switch to Telonicus and ranged to Capernian,
- Kill Sanguinar last
Tanks:
- Tanks should have pre-assigned roles and stand on their advisor's body before Phase 3 starts.
- Keep your targets as controlled as possible.
- Make sure to use the Phaseshift Bulwark active effect to become immune to Fear.
Healers:
- Spread out evenly to cover your entire raid.
- Keep everyone alive!
- Run away if targeted by Gaze.
DPS:
- Make sure to stick to your assigned targets.
- Melee should avoid going near Caspernian.
- Run away if targeted by Gaze.
Phase 4
Phase 4 begins three minutes after phase 3. This is when Kael’thas joins the fight and things get tricky. Here’s how to handle it:
Tanks:
- One Tank should tank Kael’thas on the stairs.
- One Tank should pick up the Phoenix adds that spawn periodically and move it away from the raid.
- Use the Phaseshift Bulwark to absorb damage from Kael’s Pyroblasts.
Healers:
- Avoid Flamestrike.
DPS:
- DPS should have an interrupt rotation for Kael’s Fireballs and Pyroblasts - he shouldn’t be allowed to finish any cast.
- Avoid Flamestrike
- Ranged DPS should kill Phoenixes, then destroy the egg that they spawn.
- Melee DPS should avoid Phoenixes as they have an AoE effect.
- Casters should make sure the Staff of Disintegration buff is always active.
- Hunters should equip the Infinity Blade when someone gets Mind Controlled and dispel it.
- When Kael’thas casts Shock Barrier, focus him to break it so he can be interrupted.
Phase 5
The last phase begins when Kael’thas reaches 50% health. In this phase, he no longer casts Mind Control or Pyroblasts, but the other mechanics continue and a few more are added.
All roles:
- Continue phase 4 tactics.
- When affected by Gravity Lapse, spread out and make sure to stay near the ground, but don’t touch it as it will launch you in the air if you do.
- Avoid Nether Vapor.
That’s it, you’re done! The Kael’thas fight is a lengthy one, but also quite epic. Once you manage to kill him you’ll be rolling in the shiniest loot possible - enjoy the purples!
READ NEXT
TBC Classic raid guide: How to beat Serpentshrine Cavern (with tactics for each role)
-

Long time gamer, Warcraft nerd, sometimes fancy word writer.
Sort by:
Comments :0