Knights Fall is a strategic puzzle game somewhat reminiscent of pinball, in which you control the gauge on the right to kill enemies or guide soldiers to a destination.
You can learn the basic control in the tutorial, but it mastering the controls can be challenging due to the game’s unique playstyle and the number of new systems overlooked in the tutorial.
Specifically, you may struggle in boss fights or run out of some essential items that you need to progress further. Here are some useful tips for newcomers that can help you more easily adapt to Knights Fall.
◈ Don’t miss out on free items
In Story Mode, You’ll get access to Rage at chapter 4, Explosion at chapter 7, and Thunderstrike at chapter 9. Knowing when to use these items will make it easier for you to complete tough chapters. However, don’t go overboard otherwise you won’t have the items when you really need them. That’s why you shouldn’t miss your chance to get items for free.
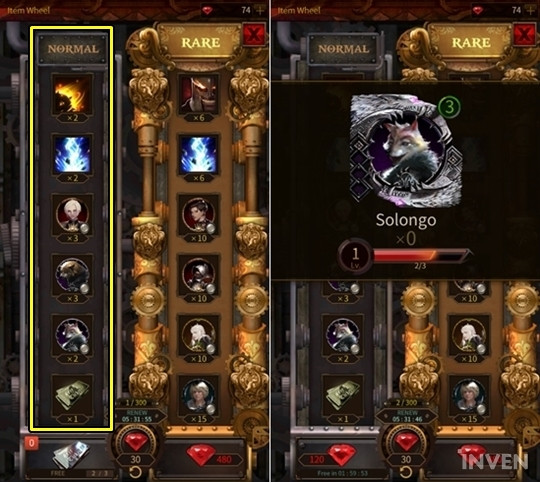
There are four ways to get free items. The first way is to use the Item Wheel, which is unlocked after you beat chapter 18 Story Mode. You can spend Rubies on the Item Wheel to randomly receive one of the items on the roulette once every two hours, up to three times a day, free of charge. Don’t forget to take advantage of this, as you’ll not only get Story Mode items, but also units used in Defense Challenge.
Another way to get free stuff is to break open treasure boxes, which randomly appear throughout Story Mode. If you destroy treasure boxes, you’ll get a Rage, Explosion, or Thunderstrike. Keep in mind that the items you acquire from treasure boxes will disappear if you don’t finish the chapter.

Yet another way is to repeat a chapter five times. You’ll get one of the three items for free on the fifth time you complete a chapter. Free items earned this way can only be used in that specific chapter.
The last way is to get them as a reward for collecting stars. You’re given 1-3 stars depending on the final score in Story Mode. Based on the number of stars, you can claim your rewards above the chapter select screen. This type of rewards is one-time only.


◈ Control your gauge efficiently
You control how far you launch soldiers with the gauge on the right. Don’t go too crazy with it otherwise you may end up wasting soldiers and failing the chapter. If you want to complete a level with the least number of soldiers, you should learn to effectively control the gauge.
When trying a chapter for the first time, try setting the gauge at the 10, 5, and 0 marks to see the maximum, minimum, and the median trajectory. If you know the general trajectory by heart, it’s much easier to predict where soldiers will land.
After you’ve got a general idea of how the meter works, adjust the gauge by one increment and then fine tune it again by 0.2. Keep in mind that a single line of the gauge represents 0.2. If soldiers are still not going to intended places, aim between the lines to nail the shot.
The first soldier to be launched after adjusting the gauge has a cross around it. You can easily see what kind of path it takes aside from the initial trajectory.


◈ Study where major objects are
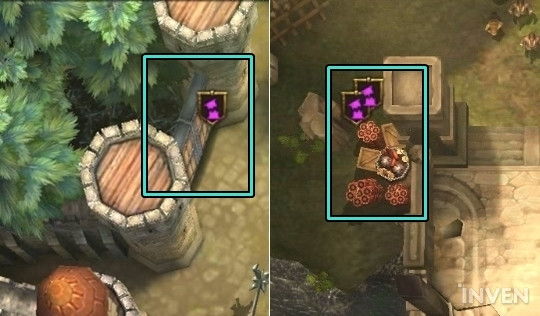
In Story Mode, there are useful objects like gates, explosives, and cannons scattered throughout the stage. How you use these objects to your advantage often decides whether you can beat a level or not, so it’s in your best interest to have an awareness of these objects.
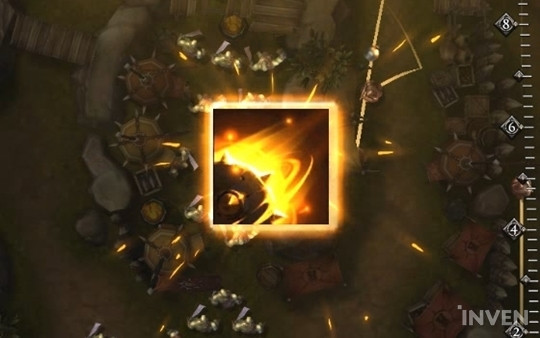
Some of the common destructible objects include gates and explosives. Destroying gates will reward you with reinforcements, and hitting explosives will damage nearby enemies or those below with debris. Most destructible objects are shiny or have purple marks above them, making them easier to spot.
The chapter 4 boss, which is a giant tank, also has shiny explosives in the back. You can specifically target these explosives to deal massive damage and incapacitate the boss for a short time.

Cannons automatically attack the enemy when you put soldiers in them. Although cannons don’t have their own separate marks like other destructible objects, the openings of cannons shine brightly so you can spot them if you take the time to look.
You’ll come across cannons for the first time in Chapter 17. There are two cannons on the left. Each cannon will hold up to three soldiers, and the cannon shots will depend on the number of soldiers inside it. That’s why it’s a good idea to provide soldiers to the cannons before enemies swarm the stage.

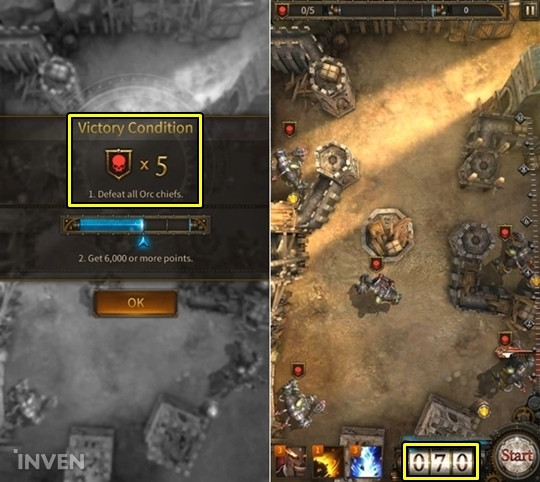
◈ Allocate your soldiers according to victory conditions
In Story Mode, there are various victory conditions such as escape, defend, and kill the boss. It’s highly recommended that you allocate your available soldiers depending on these conditions.
For example, Chapter 3’s objective is to escape with 10 or more soldiers from the available 100. You can roughly set aside 20 soldiers for escape and the rest 80 soldiers for pushing through the stage. In Chapter 17, the victory condition is to kill 5 enemies with the 70 available soldiers, which approximately comes out to be one enemy per 14 soldiers.
Not everything will happen according to your plan, but it’s still a valid strategy to allocate your soldiers according to their tasks in order to maximize efficiency.
◈ Use walls as much as possible
Given that they don’t get trapped or attacked by enemies, launched soldiers will deal damage for a maximum of three times. In reality though, most of them will just get to attack once and fall to their deaths. You can minimize wasting resources by using walls to your advantage.
The optimal case to use walls is when enemies are right next to a wall. If enemies are close to a wall, it’s best to target the space between the wall and enemies instead of hitting them directly. If you can successfully execute it, soldiers have a good chance of bouncing between enemies and the wall to deal maximum damage.
Walls are also useful for dodging obstacles or boss attacks. For instance, you can dodge the boss’s fire in Chapter 4 by bouncing off the walls and attacking it from the tank’s behind. You can also use the wall to get to hard-to-reach places.


Sort by:
Comments :0