Lots of Overwatch players neglect the importance of good positioning. This can be particularly problematic for tank players, who are constantly told that they need to be ‘creating space’ but rarely told what that actually entails. Before you can get to grips with how to effectively create space for your team though, you need a more fundamental understanding of positioning in general. So today we’re going to go over the three golden rules of positioning in Overwatch, which will hopefully arm you with the knowledge you need to make better decisions in-game.
Positioning is all about using your location on the map to make yourself more efficient in a fight.
That means giving yourself advantages over the enemy team and reducing the risk of you getting caught out. Players tend to develop their positioning on different heroes and maps through trial and error, and it’s definitely true that experience is an important factor in improving your general positioning. However, I’ve found that breaking things down into a few smaller considerations that you can question yourself on during a game is the fastest way to improve—it changes your in-game mindset and forces you to adapt. So, what do you need to be asking yourself to improve your positioning?
Where is my team?
The first golden rule of positioning is staying conscious of where your team is. This is natural for some heroes; tanks tend to dictate where the team goes and supports tend to follow them. Things start to get tricky when you are playing mobile flanking heroes like Tracer, or long-range heroes like Widowmaker who generally don’t need the protection of a shield. Since you’re so focused on taking down enemy players, you can often neglect the location of your own team.
That lack of awareness can cause a lot of issues. If you’re playing McCree and don’t know where your supports are, you won’t know where to head for some healing, and you won’t be able to help defend them from enemy flankers. On the other hand, if you’re playing Genji and you don’t know how far away your team is, how do you know whether they are ready to follow up on a Dragonblade? As a new player, I lost track of the number of times I’d pop my Ultimate and picked off a few enemies, only to realize that someone on my team had just respawned and they weren’t all ready to commit to a fight. It’s very rare that you’ll wipe the entire enemy team with a single unsupported offense hero Ultimate, and that means you need your team to help you finish the job. If you can take down one or two high priority targets as a full team fight breaks out, you’ll get way more value out of your Ultimate and have a much better chance of winning the fight. Take a second before you commit to any fight and make sure you have a good idea where your team is and where they are going.
Is there any advantageous high ground I can use?
This one is particularly beneficial for DPS players, but you may have noticed that defending teams tend to hold their position on the high ground too. Using the high ground on a map works in a similar way to peeking in and out of cover; you gain a lot of protection and the ability to dictate the length of a fight. However, there’s an additional advantage gained from being on the high ground, as you can hide the bottom part of your character model without losing your ability to see or shoot enemies.
Being on the high ground gives you an overview of the map where you can spot high priority targets, and it also gives you a nice shooting angle and plenty of cover if you step back from the lip. Just be sure to remain conscious of any potential flank routes, snipers or heroes with verticality, and be ready to fall back to your team if the enemies try to deny you the high ground.
How far away should my hero be to maximize my impact / What are the biggest threats in
range of me on the enemy team?
Effective range is something I first began considering back in my days as a League of Legends player. I used to call it threat range, for example, Blitzcrank’s threat range is equal to the range on his Rocket Grab (for those unfamiliar, it works like Roadhog’s hook). If you stayed outside the range of his Rocket Grab, Blitzcrank was no longer a threat (although you would technically have to include Flash into your calculations).
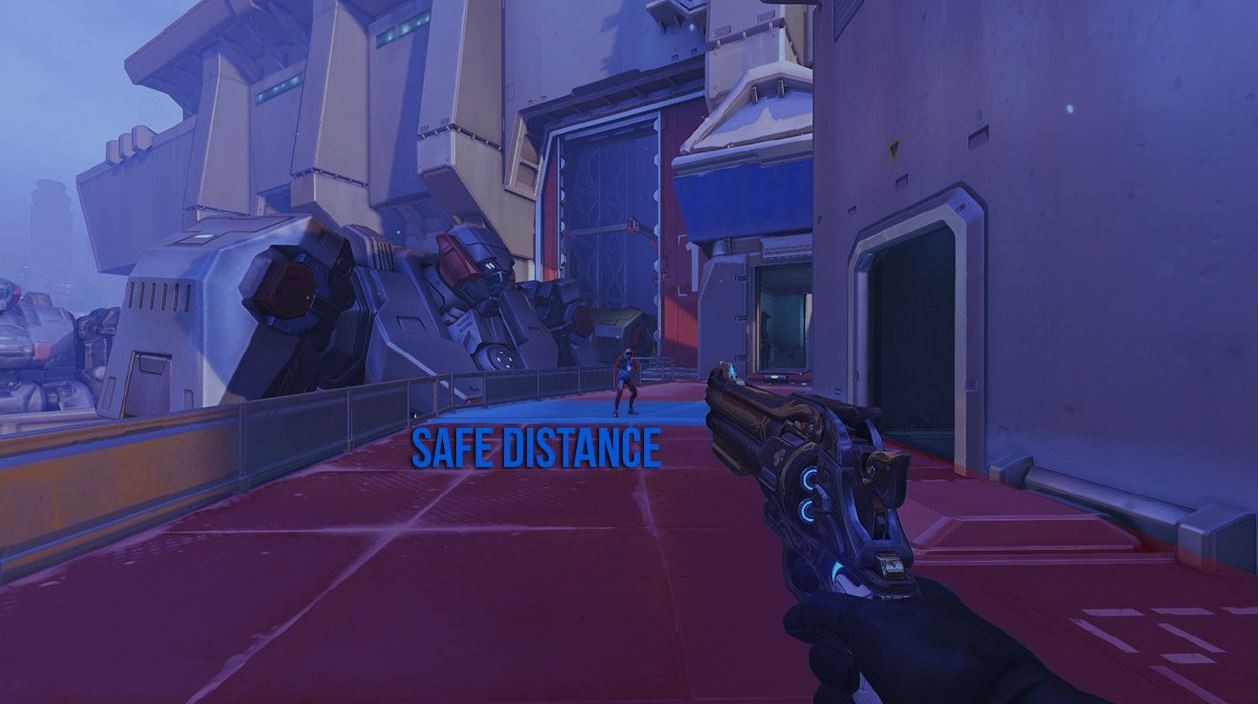
The concept works equally well for Overwatch, and you should develop a good understanding of the effective range for every hero in the game—even if you don’t play them! It’s a big component of zoning because your effective range dictates your zone of influence. Roadhog is a common example here, as his hook provides a really tangible example of what we’re talking about. If you’re playing a game against Roadhog and he lands a hook on you, then you were inside his effective range. If he tried to hook you but it fell short despite being on target, then you were playing from outside his effective range. This is the part of Overwatch that people have the most difficulty with and for good reason. It’s a dynamic game filled with 12 players, all playing heroes with their own effective range. You have to keep all those different effective ranges in mind at all times, whilst keeping your targets—whether they are allies or enemies—inside your own effective range.

Something to keep in mind is that effective ranges are varied, particularly for heroes that rely on abilities (because of cooldowns) or accurate aim. If you’re playing Tracer against a McCree, it’s entirely possible that he can two-shot you with a headshot and a body shot at mid range. It’s actually harder for him to hit you if you stay close to him (since it forces him to move his camera more when you dash around him), but then you are at risk of his Flashbang-Headshot combo. This is an example of a situation where you need a good understanding of the match up to come out ahead. For Tracer, you need to avoid Flashbang at all costs. If you remain outside his Tumble+Flashbang range, you can evade his shots and not worry about being caught by the stun. But if you stay too far back, you deal very little damage and become an easier target to hit.
No one will ever have the absolute perfect positioning, but you can start small by just asking yourself these questions and changing your position to match the answers. Be observant of the enemy team’s hero choices, and be critical of your own gameplay. If you died, ask yourself what you could have done differently—although mechanical skill is important, you’d be amazed how much you can improve by giving more thought to positioning.

Sort by:
Comments :0