First Summoner requires a fair amount of strategy and careful consideration when playing through the standard story mode for the first time. These required skills ramp up in importance when attempting to play the games more difficult challenge modes, so we created this guide to help the learning curve!
For starters, if you are reading this then you are likely playing First Summoner during the games primary launch event. Good idea -- the number of free goodies and resources given are too good to pass up. The launch event is good for 7 days when you first log on and these are the prizes you can expect:
List of Rewards and Daily Events
- DAY 1 - Beginning of Your Journey: Clear [1-5] Heart of the Forest (Normal) 1 time
- 1,000 Coin
- DAY 2 - Kind Adventurer: Perform a total of 3 Request Quests
- 200 Diamonds
- DAY 3 - Trials and Chests: Open a trial chest at Stage 1-10
- 3,000 Gold
- DAY 4 - Traveler of Chaos: Enter the Infinite Chaos
- 400 Diamonds
- DAY 5 - Evolution of Darkness: Achieve level 15 with Rachel
- 500 Diamonds
- DAY 6 - Beginning of the War: Attack 4 Times at Battlefield of Snake
- Ancient Card Chest (Acquire 98 randomly selected cards upon opening the chest)
- DAY 7 - Start Unsealing: Complete Stages 5-10
- Hidden Card (Legendary) (Acquire 1 random Legendary card upon revealing the Hidden Card)
The day 7 reward is the most valuable and the random Legendary card is a must-have for players looking to create the most powerful teams of monsters. Multiple legendary cards are the goal when it comes to any top-tier deck, but the first card acquire can help guide the deck building process. In short, build around your most powerful summon for the best effects.
As you go about your journey in First Summoner, it isn't enough to just collect Summoner Cards -- you will want to upgrade them using Gold. As a general rule, you want to upgrade your most powerful Summoner Cards first but only if doing so proves cost-effective for the amount of Gold you are able to earn while playing.
For example, if your team is comprised of less rare Summoner Cards with smaller max levels, it may be wise to upgrade all of them first before you sink all of your limited early resources into 1 powerful Summoner Card. You will, on average, enjoy the benefit of your multiple upgrades as opposed to just one and this early team can be used to clear through the standard missions and game while you save up resources to create a legendary team worthy of PvP or Challenge modes!
- About Summoner Cards:
- Requires a certain amount of gold to level up a card; each level requires more points and more gold to be spent.
- Leveling up cards increases a variety of stats that are specific to that summon.
- Each card has a different max level that you can upgrade to.
- Gained through random enemy drops, chests, progression through the story, and purchases through the card store
- Every duplicate card that is earned is repurposed into points for upgrading that card.
Sample Team Composition
A balance of spells, support cards, Area damage, and hard hitters make this sample team capable of taking on the first 5 bosses when piloted properly.

Dark Wind (Mana Cost: 2) (Rarity: Epic)
Controls the air and shoots dark winds, creating openings in your enemy’s defense. Strike them and finish off your enemy
Note: Great spell card that puts power into your primary character's hands. Line it up correctly and you’ll wipe out lower level enemies and stun tougher ones, allowing your summons to receive an advantage in battle.
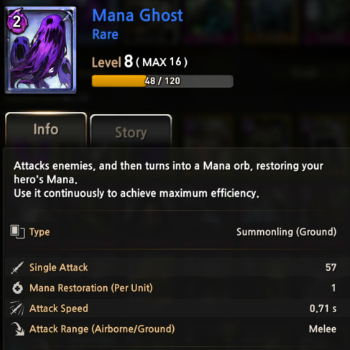
Mana Ghost (Mana Cost: 2) (Rarity: Rare)
Attacks enemies, and then returns into a mana ord, restoring your hero's mana. Use it continuously to achieve maximum efficiency
Note: Cheap unit with a ton of useful mechanics. Pump these out after every cooldown to deal a small amount of damage and lock down enemies for your other units. Great for saving up mana for more costly summons.

Skeleton Archer (Mana Cost: 5) (Rarity: Common)
Summons two basic Skeleton Archers. The most cost-effective soldier to create a reliable troop with
Note: Great for dealing damage from afar while tanks soak up the damage and relatively cheap. Popping these out every time they’re off cooldown with ensuring you have a great way of taking out hordes of enemies near the end of levels.

Troll Healer (Mana Cost: 5) (Rarity: Epic)
Heals the biggest ally within range with spiritual power. The more he heals, the weaker he becomes, but that’s just the price for being able to spiritually heal his comrades.
Note: Keeps your most valuable units in the game! Perfect for taking sustained damage. They’re able to stick around relatively long if nobody’s targeting them and relatively cheap, so they’re easy to replace.
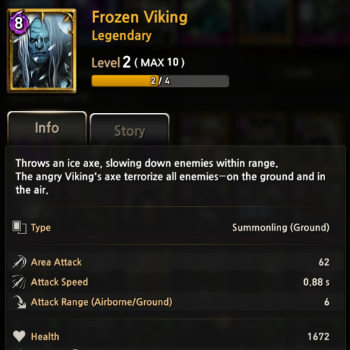
Frozen Viking (Mana Cost: 8) (Rarity: Legendary)
Flexible and powerful summon that does a great job dominating foes at mid-range. Slows down enemies for the tank while protecting ranged summons in the backline.
Throws an ice axe, slowing down enemies within range. The angry Vikinig’s axe terrorizes all enemies - on the ground and in the air.

Demon Rabbit (Mana Cost: 9) (Rarity: Rare)
Jumps into enemy territory and inflicts critical damage on multiple enemies. You can count on the Demon Rabbit to create mayhem in the battlefield.
Note: Great for engagements as he leaps at groups of enemies, stunning them and causing a ton of AOE damage. Even better when it’s paired with Troll Healer’s heals and Frozen Viking’s slows.
There are three levels of equipment modification for your primary character. Level one assigns a random modifier while Level 3 allows you to choose one from a list of 8 random modifiers.
- There is a ton of modifier variety, from increasing health/damage of specific units you control to improving hero attack and mana.
- Players can also craft powerful equipment through blueprints you collect through the game along with the appropriate material that can be found in chests.
- Dismantling is also included as a feature, which allows players to break down unwanted equipment for crafting materials.
- Equipment is equipped to the player character to increase a variety of stats, such as max hp, attack damage, critical change rate, critical hit damage, max mana, rate of mana recovery, and more.
- Equipment falls into 5 categories: Weapons, Hoods, Boots, Necklaces, and Rings
- Once the player unlocks the in-game Blacksmith, they can modify all of their equipment if they have enough diamonds/coins.
Currently, there are 5 primary areas in the game, each with their own challenging boss to face at the end. Each time a player defeats a boss, they unlock a more difficult version of that area with harder enemies and a much harder boss with different move variants.
Note: Hardcore mode is very difficult and first-time players will unlikely be able to defeat a boss on their first try. Keep growing your squad and strategic understanding of the game to stand a chance!
World 1, Stage 10 Boss: Flaming Executioner
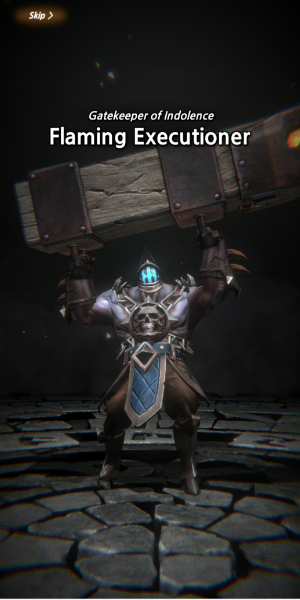
The Executioner is a lumbering warrior that swings around a battering ram as his primary attack. He’ll knock back any melee units you throw his way is a single swing, so make sure you’re using a summon that’s strong enough to take the damage. If you manage to keep a couple ranged summons on the field, you can make short work of the smaller units the Executioner will summon throughout the battle.
He also has an attack that does a good amount of damage in a straight line right in front of him. Make sure your primary character is on the move when he telegraphs the attack so you can dodge taking damage.
World 2, Stage 10 Boss - Mace Tyrant
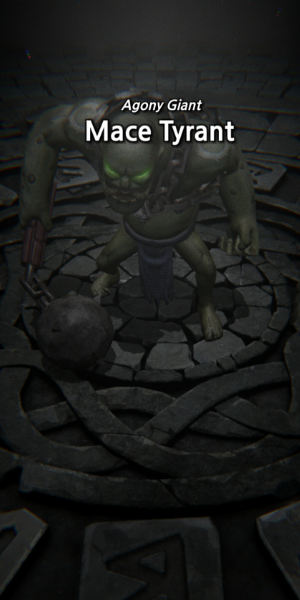
Mace Tyrant can be a lot to handle if you don’t have the right summons equipped. Right of the gate, he’ll charge at you and your initial summons, stunning and dealing a ton of damage in the process. It’s best to back away and bring another wave of units far away from the action, as Tyrant is bad at handling summons in multiple locations.
Once he starts charging up his mace attack, start moving! By the time the target shows up on your primary character, it will be too late to get out of the way if you aren’t already on the move. Keep moving and keep your summons spread out and you will do fine.
World 3, Stage 10 Boss - Immortal Lord
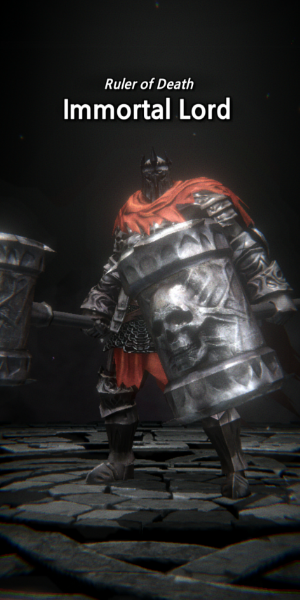
Immortal Lord is a big bruiser with a lot of utility. You’ll want to adopt a strategy similar to the one used against Mace Tyrant -- make sure you’re bringing in your summons in multiple spots throughout the ring. Immortal Lord won’t be able to handle them all at once.
Once you’ve inflicted enough damage and smacked around his spectral projection, hit the prompt on his back to launch a unique animation and deal a ton of damage! You’ll want to look out for his phantom summons when they show up and take care of them as quickly as possible so your units can go back to focusing on the boss. Ranged Summons do a good job at switching focus onto phantom summons, so consider mid-range damage dealers here.
World 4, Stage 10 Boss - Black Lancer

Black Lancer is a quick foe that has a lot of moves up his sleeve. His most unique threat is that he has his own mana pool that he uses to summon various demons onto the field to fight for him. On top of that, his lance attacks are quick and can threaten a powerful stun that can be lead up with a lethal combo!
This fight is all about crowd control abilities and spells that can slow him down. Use spells like Frozen Field to slow his attacks and movement, locking him in a solitary state for you minions to attack. Keep on the move and try to have at least one slow on him at all times while your other forces take out his summons.
World 5, Stage 10 Boss - Ruler of the Sky

Put your anti-air summons in the deck for this one! Ruler of the sky floats above the battlefield, so units that can’t deal with that won’t be of any use. His main attacks are a sweep that pushes away units and a flame attack that does sustained damage in a single row.
Skeleton Wyvern and Troll Healer are good summons to use right away, as the Wyvern can go head to head with the Ruler if he’s being healed. Bust out as many ranged units as you can while the Wyvern soaks the damage. After a while, three pillars will pop out of the ground and start healing the Ruler as he sits in an idle state. Take out the pillars as quickly as possible to stop the healing!
Once you have enough units on the field, just worry about taking out 2 pillars and you’ll do damage faster than the third pillar can heal.
Stayed tuned for more First Summoner strategy, guides, and challenge break downs. Drop a comment below and let us know how you took on the first 5 bosses. For more First Summoner Information, visit official Website and Community.
First Summoner is now available on Google Play and App Store for download.
-

Warcraft 3 is my one true love and I will challenge anyone to a game of Super Smash Brothers Melee.
-

Sort by:
Comments :0