Knights Fall’s gameplay is quite simple – launch soldiers using the gauge on the right side of the screen to complete chapter objectives. However, there are some variables, like the different objects that are placed around the chapters. When soldiers come in contact with these objects, certain effects occur, which can impact your stage-clearing ability. Players have to always think about how to strategically use objects to their advantage.
One general rule of thumb is that it’s much more effective for soldiers to spend more time in the air using objects like springs than to go down in a straight line. You can also destroy explosive crates to quickly dispatch your enemy and have more soldiers left over, giving you higher scores. It probably goes without saying, but you can easily clear chapters if you understand how to use these objects.
It’s always a good idea to study the battlefield when you first get into a chapter because destructible objects intermittently flash on the screen. Taking a mental note of where those objects are helps you decide where to shoot your soldiers.
◈ Spring Objects: Changing directions and gaining momentum
The most influential object in Knights Fall when it comes to completing chapters is the spring. When a soldier touches a spring, he will change directions and gain momentum to reach enemies that were previously unreachable. There are two types of spring objects: a spring that can change a soldier’s trajectory in all directions and the one that can only do it in a single direction.

In the latter case, you can specifically target an area to send soldiers. The expected path is constant so it’s efficient to adjust the gauge if there are no more enemies left in that location. In the former case, it’s difficult to figure out which way soldiers will go. However, you can more easily reach enemies in the distance using the built-up momentum or the direction change to get at enemies behind obstacles.

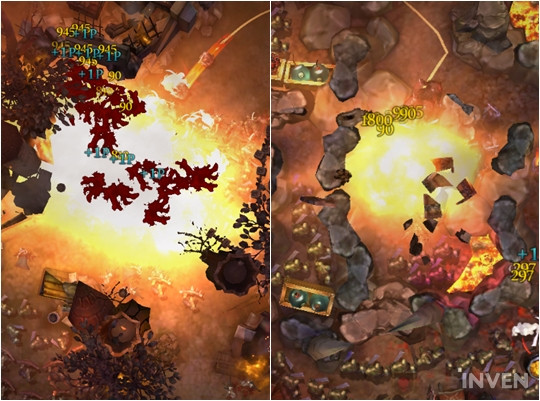
◈ Exploding Objects: Good for dealing with structures and commanders
Once you’re in a chapter, destructible structures and exploding objects shine, notifying you of their locations. Exploding objects either explode in the same spot or discharge bombs which can be used to kill enemies below. You can make quick work of Thorn Shield Soldiers or open new paths when you make these objects explode, so keep an eye out for these.


◈ Spinning Objects: Offering flexible utilities
Soldiers can weigh down on these objects to spin them. For example, putting enough soldiers on a blade will cause it to rotate, killing enemies caught in its path. Additionally, you can hit a cross-shaped object to open doors or change the direction of an ally’s attack.


In certain chapters, you’ll see cross-shaped objects and spring objects. The former is good for jumping over Thorn Shield Soldiers to reach the enemies in the back, whereas the latter is used for sending soldiers through a narrow passage. Since both of these objects continuously spin, sometimes you’ll miscalculate the soldier’s predicted path and end up launching them in unintended places.


◈ Projectile Objects: Precision is key
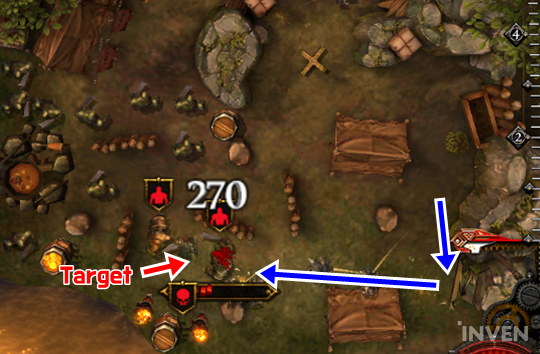
Cannons can more precisely guide soldiers towards the desired location compared to springs or spinning objects. Soldiers who make contact with a cannon are fired as projectiles with enough momentum to reach enemies in the distance as well as those in curved areas. One caveat is that the cannon will mostly fire at a fixed angle, so be careful when there are Thorn Shield Soldiers.

In some chapters, cannons change firing directions. Take extra care with your timing as you may lose valuable soldiers this way.

◈ Trap Objects: One brush will instantly kill you
Soldiers will instantly die if they come in contact with lava and spiked structures. It’s highly unsafe to launch all your Charging Soldiers at once in areas where this type of obstacle exists. First use regular soldiers to break open paths, then move on to the charging ones so that you can maximize damage while minimizing casualties.

◈ Watchtower Objects: Sustained long-range damage
From watch towers, enemy archers fire arrows at your soldiers. A single hit will kill a soldier, so take out the watchtowers as soon as possible to minimize their impact. Watchtowers have their own health, and you have to deal a certain amount of damage before they go down. You can speed up this process by finding explosives in the vicinity or burst them down with Charging Soldiers.


Sort by:
Comments :0