Disclaimer: This article contains curated tips, guides, other useful information posted on Inven KR by the users. Please note that such guides and information are not objective truths and may not reflect the latest patch or meta changes.
*Original guide from LoL Inven KR by 워씽워쑈 (wossingwossyo) [Link]
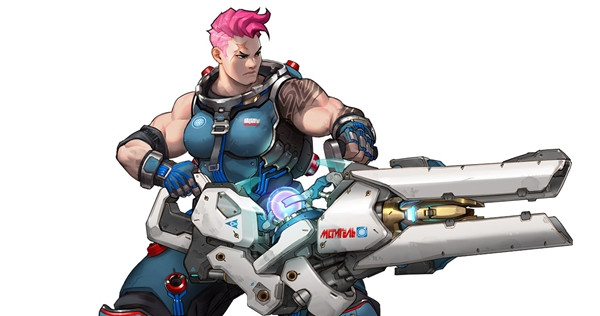
I have two game accounts that both reached 4100++ with Zarya only.
I’m still climbing higher, but I think I’ll be serving in the military before I reach the top 500.
There are already lots of beginner guides, so my guide is for players that have decent experience with Zarya but are still having a hard time increasing their CP.
The most desirable play style this guide is aiming for is zunba’s Zarya. Watching his videos helped me improve as it allowed me to learn things one by one and, ultimately, make myself a better Zarya player.
I don’t mean to imitate his outstanding mechanics, but I do want to organize and write down the key features that make him an outstanding Zarya player.
[1] Aim
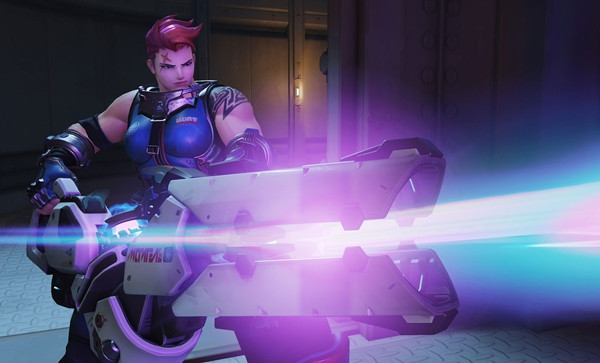
Aim is really important for Zarya.
Working on your M1 accuracy allows you to pick up otherwise impossible kills and shut down enemies faster than usual. You can still try to sustain your DPS with M2 until you reach a certain point, but if you want to climb higher in the ladder, you should practice increasing your DPS with your M1 aim. There are a few pieces of advice for those who have difficulty tracking the enemy with M1. (This advice on aim also applies to other Overwatch heroes.)
■ 144Hz monitor
After playing Overwatch with a 144Hz BenQ monitor in a PC Bang, I’ve realized how much I was losing from playing with a 60Hz monitor. I’ve also heard that there are no Overwatch pro players who don’t use 144Hz monitor. Seriously, the most important gear when playing Overwatch is the monitor. 60Hz now makes it hard for me to aim or keep track of what’s going on in the game. The difference is even bigger when it comes to heroes centered around tracking aim such as Soldier: 76 and Zarya.
■ Low mouse sensitivity
Since Zarya is an aim-based hero, I set my mouse sensitivity similar to when I play McCree and Soldier: 76.
I use 1600DPI* 2.7 (=4320 eDPI). (zunba’s sets his mouse sensitivity at 2800 eDPI.)
Individual sensitivity settings should be set up on the standard of whether you feel comfortable when you move your sight to 90 and 180 angles. Make it as low as possible within that range.
Besides these tips, improving mechanical factors such as tracking your enemy or getting the hang of the arcing splash projectiles are up to how much you practice.
[2] Ability Strategies
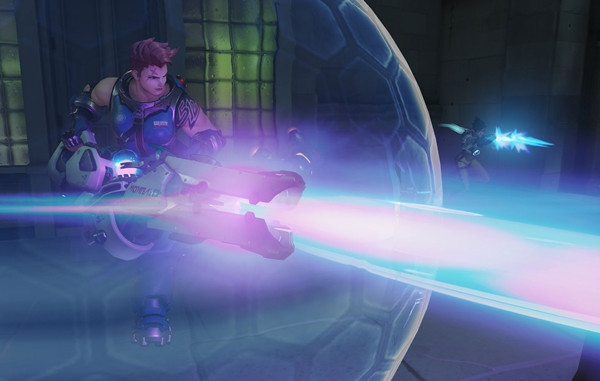
■ Barrier fight
The current meta makes it easy for Zarya to charge her energy thanks to Reinhardt and Roadhog.
The basic strategy is that you give your first Projected Barrier to Reinhardt and then jump into the incoming fire as you use Particle Barrier to absorb incoming damage and charge your energy.
You should keep in your mind the following:
ⓐ Give the barrier to your ally when the enemy is already attacking, not before they start to attack.
It’s no use if you shield your ally in advance. Shield your Reinhardt when the enemies start to hit his Barrier Field. Save it until enemy Fire Strike or Roadhog’s M2 come in.
ⓑ Shield your ally as you predict the timing of the enemy’s incoming attack.
For example, Roadhog’s M2 usually has a consistent tempo. After Roadhog fires first M2, give Reinhardt the barrier right before Roadhog fires his second M2. (This is to prevent Roadhog from stopping the attack because of the Barrier.)
Plus, do not waste your barrier by using it when the enemy is reloading. Keep an eye on them and activate your barrier when they start to fire again.
ⓒ Don’t get hooked!
After using your E, press Shift and soak damage as you walk in and out of Reinhardt’s shield. Just make sure that your barrier is being hit.
Now, if you walk out too far, there is a high chance of enemy Roadhog hooking you right after the barrier is gone, which can tilt the game quite heavily.
This kind of bad situation happens more frequently than you might imagine, so remember to walk out of Reinhardt’s Barrier Field just slightly enough to make your shield get hit instead of his, and then walk back inside right away when yours is gone.
If you get used to this, you will be able to reach around 80% charge in the first standoff. Then you can spray your laser all over enemy Reinhardt’s shield.
When the enemy Reinhardt puts his shield down, use M2 to poke whoever’s behind, such as Soldier: 76, Ana, and Lúcio. (One or two successful hits of high-charged M2 is enough to threaten their lives.)
In other circumstances, when you have charged enough energy (above 70), save your E to protect your allies that get hooked by enemy Roadhog rather than using it to charge your energy further.
Of course, when your teammates are just playing whatever heroes they want, just give your barrier to whoever is likely to give you the most benefit.
■ Saving barrier = Gaining energy

There is one crucial rule that everybody knows but don’t follow most of the time. You have to save your barrier until you need it.
You guys might think, “I tend not to waste my barrier and save it until the right moment.” Actually, although I reflected on my Zarya play through replay of my livestream and worked on fixing the issues, I still see myself wasting barrier multiple times.”
What I learned from zunba’s Zarya is that he saves his barrier the whole time, even in situations where I would have already pressed the E button.
I saw that he uses the barrier only when he is in grave danger, or when he is already being attacked so that shielding himself would certainly lead to energy gain.
Saving barriers for the right moment allow you to protect your allies effectively at crucial moments, while also maintaining decent energy level.
The most common situation when players waste the barrier is when they use it because they think they’re going to be attacked. However, in most cases, it’s never too late to apply the barrier after you start receiving attacks from the enemy.
Unless it’s the kind of situation when using your barrier in advance is unavoidable, it is best to save it to the very last moment.
How do I maintain energy level? Save the barrier as much as you can and use it at the right moment.
Try to avoid wasteful situations in which you can’t raise your energy level more than 20 at one shot.
■ How to charge Graviton level quickly

What makes "Zunba" charge his Graviton so fast?
Zarya’s ult meter builds up according to the damage she dealt to the enemy.
Zarya’s damage output is directly proportional to her energy charge, so maintaining high energy charge is the core factor in building ult meter faster. M2 on a group of enemy heroes works well, or you can also keep your M1 on enemy tank. It works well either way.
When zunba uses his ultimate, he usually ignores the tanks and aims for the group behind them, such as Soldier: 76, Ana, and Lúcio.
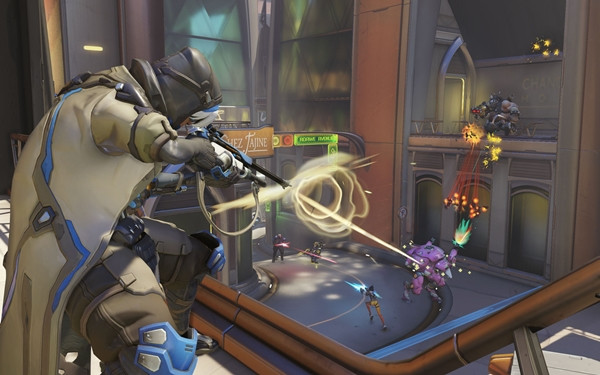
Even when you drag three or four enemies into your Graviton Surge, if there’s no Ana in there, she can grab the chance with Biotic Grenade turn the table around. You should focus on Ana as you fire your Graviton. Even after drawing Ana in your ultimate, I recommend that you eliminate Ana first with the energy beam. That’s how crucial she is in teamfights right now. (If you hit someone else besides Ana, she can spam heals and save that someone you are firing at.)
This, of course, depends on how the game unfolds and what kind of situation you encounter. For example, if ally D.Va is ready to throw her Self-Destruct and eliminate the enemy tankers, or if there are other possible ult combos that can produce promising outcome, you can just use it right away for the profit.
You should avoid firing Graviton without ally ult to connect. You can’t kill anyone in this scenario, and it is even worse if all you managed to pull were only enemy tanks.
Be careful when aiming Graviton towards enemy healers. Healers usually position themselves behind their teammates, so using Graviton on them may make it too hard for your allies to respond due to the distance being far.
You should coordinate with your teammate through voice chat to coordinate upon your Graviton, or simply kill the enemies yourself with high energy.
Such situation can also be seen sometimes in zunba’s personal streams too, in which his ultimate ends up killing no one because he went too deep inside making it hard for his allies to respond.
■ Make the best use of voice chat when using your ultimate

Inform your team when you’re about to use your ultimate, saying “I’m going to use my ult,” through the voice chat.
It is even better if you discuss which other ultimates to use or spare with your team.
There’s a big difference in response time when your allies know that you are about to use the ultimate, and when they follow-up with your Gravition after they hear “Fire at will!” They need time to position themselves, and they need to find you if Graviton is out of their sight.
It’s more important to further communicate with your teammates after you drop Graviton. Tell them how many enemy heroes are pulled in, and whether priority targets (e.g. Ana) are pulled in.
Since it is hard for others to tell who is pulled by Graviton, Zarya should be the one to notify the teammates, because she’s the one that was keeping track of the targets before dropping Graviton.
Examples: “All healers are tied up.” ”I got Soldier: 76 and Ana.” “I got four of them.”
Such short sitrep is just enough to keep your teammates on track and allow them to make necessary decisions.
■ How to use Graviton at the right moment
ⓐ Firing Graviton as you jump off from high places
Being in high places is good since the broad range of sight helps you figure out how to aim your Graviton.
There is also extra time to think as you jump off. It also makes it harder for the enemy to predict what you’ll do, so this can be an effective strategy.
If there’s D.Va in enemy team, you should use the ultimate out of her sight, or directly fire in the spot where you want Graviton to stick.
ⓑ Walk straight in
Run straight towards the enemy team with your barrier activated and fire Graviton in the middle.
This method is less likely to fail because you can use your ultimate quickly and you can clearly see where the enemies are located.
But if the enemies are scattered all over the place and you can’t use your ultimate properly, you could be in danger after your barrier is gone.
This tactic is used when you give entering orders before starting combat through the voice chat. All of your team rushes in promptly with the support of Lucio’s speed amplification
ⓒ Graviton wall and ceiling
Use this tactic when you need to drag down the enemies located on the second floor or to fix enemies to narrow entrance. Reinhardt may fight back with his Earthshatter if you fire Graviton on the ground, but he cannot do that if you hold him in the air. Keep in mind that your team won’t be able to deal much damage on enemies if the Graviton is used on an improper location.
You can see frequent use of this mostly in Lijiang Tower, and you can learn where to use it if you watch a couple of zunba’s livestreams. You should watch zunba’s video clips for detailed information about where to use your ultimate. Hearing about it a bunch of times is simply not like seeing it once.
Besides these strategies, just use Graviton when you can tie up three or more heroes with low HP or whenever it looks like you can tie up four or more enemies regardless of which heroes they are.
■ Rocket Jump
You all know you can rocket jump by clicking M2 and jumping at the same time (you should actually click M2 slightly before jumping.)
It is all about how you utilize it. You can jump higher than you think—you can even jump over most walls. (As you can see in zunba’s stream, he really knows how to use it properly.)
As far as I can remember...
- You can use rocket jumps when you’re escaping. This helps you take less damage than just running straight.
- In Lijiang Tower’s night market map, you can jump over the small window located at the control point. (This is useful when avoiding Self-Destruct or chasing after an enemy.)
- You can jump over the bottomless pit of Lijiang Tower’s garden map.
- You can jump over most of the mounds in Temple of Anubis.
- At Hanamura’s second control point, you can cross over the second and third floor balconies with your rocket jump.
-zunba’s climb-up ultimate in Eichenwalde during the World Cup at BlizzCon
You can learn these from watching Zunba’s POV.
[3] Taking position

■ Zarya should take place in line 1.5
If your allies are out of sight, you’re already doing it wrong. Standing in the very front as Zarya isn’t a good position. Taking position in line 1.5~2 is the proper position for Zarya. You can keep the main tank in front of you and give your barrier, and also help the healers when they are attacked.
Try to stay in this position all the time. One important thing to remember is that your allies also keep moving around and change their positions. If your team starts to retreat, you need to retreat with them as well.
Players usually don’t notice that they’re in the very front line of the team, then realize it too late and get killed. Always stay with the team, and near the main tanks.
■ Stay in Ana’s sight
This tip also applies to all other heroes. Fighting within the range where Ana can heal you can entirely change the game. You can even get a nano boost from her, too.
Zarya’s relatively low HP sometimes makes her unstable, but she is hard to kill with Ana watching her back. Her energy level stacks up higher as she survives for a long time, and this makes her a killing machine.
Be careful when you go inside a building or go around the corner where Ana won’t be able to heal you anymore. In this situation, Ana will usually tell you through voice chat that she can’t see you.
[4] The combat
■ Shield Reinhardt

Give your barrier to Reinhardt when he’s swinging his hammer around. Since the battle revolves around Reinhardt, the team that wins the Reinhardt showdown will take advantage.
Reinhardt’s enormous body size efficientlyl charges your energy level, and you can protect him by releasing him from enemy Ana’s heal negation.
If there is no one attacking your team, give the barrier to Reinhardt. However, give the barrier to Genji when he is about to use Dragonblade with Ana’s Nano Boost.
■ “Slow down”
When you watch zunba’s stream, you can see him constantly saying “slow down” to his team. This means that he is for waiting his barrier’s cooldown. (He is also telling his allies not to rush.)
He is doing so because he already used his barrier to charge his energy level. He is waiting until he can use the next barrier so that he can protect his teammates.
The cooldown is crucial, as it often determines whether your team will live or die. Thus, if your team tries to attack right away as soon as you’ve charged your energy level, you need to slow them down a bit. (Just rush in if the situation warrants it.)
The situation tilts towards Zarya the longer the battle lasts. She can fight with high energy charge, and this allows her to protect allies even more efficiently.
■ Get Ana

Once Zarya reaches high enough with her energy, she becomes one of the few heroes that can eliminate Ana quickly.
Since activating barrier can protect you from Ana’s Sleep Dart and grenade, you can kill her more easily compared to the other heroes.
If you don’t kill her in advance, it will be harder to shut down enemy tanks, Her Nano Boost will also give you hell. Killing Ana is your first priority in teamfights.
■ Importance of staying alive
The most important factor to which you should pay attention when viewing other players’ Zarya’s stats is their average deaths.
Every hero’s death matters, but Zarya’s characteristics make her death is even more critical. If she dies, she has to restart from zero energy level. During that time, she can’t deal damage, her ultimate meter charges slowly, and she can’t protect her team with barrier.
As you can see in zunba’s play and his stats, he rarely dies. This is why he has such high average energy. It’s also because his positioning is very stable (line 1.5), and he tries to keep himself safe (near Reinhardt) where the enemy can’t focus their fire on him. When he does run into dangerous spots, he always activates barrier. He only steps out a certain distance so that he can instantly retreat when the barrier is gone.
He only goes further when he is sure that he can get rid of all of the enemies. Since Zarya’s shield that constitutes 200 of her total HP regenerates soon enough, she has high stability in battle unless she overextends herself.
I’m not telling you to focus only on your survival and care less about supporting the team. It’s fine to die after playing your part when necessary, but do try to die less.
■ Keep an eye on the kill feed (When to retreat)
More people don’t pay attention to kill feed than you imagine, but kill feed gives an important real-time sitrep that helps the team decide when to attack or retreat.
You may be too busy fighting the battle to keep track of everything on the feed, but you should at least keep track of who is dead.
Tell your team to attack when a crucial member hero in the enemy team goes down, and retreat when a majority of our allies are dead.
Sharing such information through voice chat is the best, but you should also keep track of the information that on the screen and evaluate the situation on your own.
I am writing this because a lot of people don’t notice it fast enough when most of their allies are already dead.
When three or more of your allies are killed, you need to just kill your character or retreat. Don’t stay in the battle and mess up your team’s respawn timing.
But in KotH maps when your team has already captured the point, it is better to contest the point as much as possible.
[5] Other points
■ Maps that are hard for Zarya
Zarya can do well enough in most cases, but there are some maps where it might be tough to figure out what to do with Zarya or you can’t make the most out of her.

ⓐ Numbani Point A defense
You can’t really increase your energy level since there aren’t many barrier fights in here. Teamfights tend to begin and end quicky. Also, while both sides of the second floor are the key battle points, Zarya’s lack of mobility makes it hard for her to go up again once she comes down.
Therefore, in Numbani, I think combination of Reinhardt, Roadhog, and Winston is best in here.

ⓑ Oasis
There are too many walls that block your sight and make it hard to give barriers to your team.

These are the maps that are better for Zarya to do her job.
- Most of the control maps
- Eichenwalde point A defense
- Hanamura point A defense
Zarya is also good in other maps where the combat tends to last longer and where you can easily charge your energy. Actually, it’s fine to pick Zarya right away in every situation.
■ Review your play
You can learn how to play Zarya by watching zunba’s POV, but you can’t see what you’re currently doing wrong. It’s hard to tell if you’re doing something wrong while you are playing the game yourself, so I suggest that you record your play and watch it again. I’ve streamed on Twitch once, and I was able to see what I was doing wrong by reviewing my previous streams. We’re used to watching outstanding players’ videos. If you watch yours, you’ll easily catch what your problem is and find a way to fix it.
[6] Things you shouldn’t do (which I’ve done a lot)
- Diving all the way into the enemy line with your barrier on to charge your energy
(Most of the heroes who already used up their self-protection ability end up being killed.)
- Wasting your barrier to charge your energy level while the enemy is about to use ults
(Save it unless your energy level is seriously low. Charging your energy level by blocking the ultimate with your barrier is enough.)
- Using your ultimate without monitoring the kill feed when your team is all dead
- Getting hooked by Roadhog in the first barrier fight
(You can shield your teammates if they get hooked. But if you get hooked, you’re dead.)
- Fighting with Roadhog without ordering focus firing in the voice chat
(Unless Roadhog isn’t grenade by ally Ana, focus on other targets since he can instantly recover with his breather and heal from Ana.)
- Acting out all alone at the front line in all circumstances
■ Mini Tips
- Fire M2 on D.Va’s mech shortly after it goes down, and if your energy level is high enough, you can halve Hana’s HP before she lands on the ground.
- When your team is pulled into enemy Zarya’s Graviton, the priority of your barrier goes in the order of healer-DPS-tank. (Tanks can hold up for a bit by themselves. This will make it difficult for enemies to focus fire.)
- Spamming crouch can be effective when fighting against hitscan heroes such as McCree and Widowmaker
- Before D.Va’s Matrix update (Feb 4, 2017), D.Va can’t eat your Graviton if you fire it in close proximity to the ground. It also works when you stick it directly on the payload.
- When your team has Genji, Tracer, and Winston, give the barrier to Winston first
■ Versus Roadhog

- When your ally is hooked by Roadhog, save your barrier for the last minute until Roadhog fires at your ally so you can stop him from firing. (You also gain 40 energy level)
- If you run into Roadhog when your energy is low, block his hook with your barrier and run away as fast as you can. You can’t beat him.
- When your ally is hooked, fire M2 at Roadhog’s feet. This can shake its aim.
Sort by:
Comments :0


